
This is a basic how to make a rag quilt tutorial, and you can follow it to create your own. This tutorial explains how to make a rag quilt by using a walking foot to sew it together, as well as 1/4” snips and a ragging cutter. Before you begin, make sure that you have the right size squares and that your sewing machine has a walking foot.
Sewing a rag quilt with a walking foot
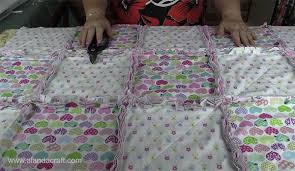
When sewing a rag quilt, using an even feed walking foot is essential for accuracy. Using a walking foot allows you to sew layers together much more easily and prevents puckers and tucks. The walking foot also allows you to sew thicker fabrics such as t-shirts and fleece with a larger needle and longer stitch length. Make sure to follow the directions carefully when sewing the quilt to prevent any mistakes.
First, prepare the rag quilt layers by pinning them together. Make sure that the fabric for all three layers measures a half inch smaller than the batting in the central layer. If you don’t have a ruler, use a washable fabric marker to eyeball this step. Then, cut the batting squares with an X shape that will fit inside the half-inch seam allowance.
Using a ruler
You’ve heard that cutting the seam allowance is important when making a rag quilt. That’s true – you’ll want to clip the seam allowance 1/4 inch from the edge of each strip, but not all the way. This can result in loose blocks or frayed edges. It’s best to cut the seam allowance to the point where it’s even with the previous side. But, if you don’t like to use a ruler, you can just cut off the seam allowance and sew the strips together instead.
When sewing layers, a rag quilt requires at least three layers, and if you’re working with lightweight fabrics, it may require a fourth layer. In most cases, the final layer is polar fleece or flannel. Once you’ve sewn all of your layers together, you can attach a binding or a label – these are both easy to apply and will keep the finished quilt from fraying.
Using 1/4” snips
To begin, sew together the squares in rows with a seam allowance of about 1 inch. Use a straight or zig zag stitch to stitch around the entire blanket. Once you’ve sewn together all of the squares, use a snipper to cut off every quarter to half inch around the exposed seams. Be sure to cut evenly on each seam and along the outside edge of the blanket.
To snip the fabric, use a pair of snips measuring 1/4″ in width. This will cut through up to 64 layers of cotton fabric. Then, sew on the finishing strips to complete the quilt. Then, repeat steps 3 and 4 until all seams are snipped. After sewing the finished quilt, back stitch the seam. This will prevent fraying.
Using a ragging cutter
This rag quilt tutorial will show you how to use a ragging cutter to make your own rag quilt. You’ll need a walking foot and a dual feed foot in order to create this type of quilt. Also, you’ll need a larger needle, and you’ll need to press seams open. Lastly, make sure to cut your seam allowances evenly so that your rag quilt will be smooth and free of any imperfections.
To start, cut all your rags into 8″ squares. Next, sort your rags by top, middle, and bottom layers. This way, you can easily stack them for the best result. You’ll need nine rows of seven squares, one right side together and the next, wrong side up. Repeat the process for the remaining rows. When finished, your rag quilt will be ready for quilting!
Using a chain stitch
Whether you choose to create a random layout or choose a pattern, using a chain stitch will make sewing the rows a lot easier. First, you’ll need to put the blocks back to back. You can then sew one side of each block together with a half-inch seam allowance. Remember to leave a small gap between the rows for the thread to come out and clip the seam allowance. After that, you can move onto the next step: sewing the rows together.
Once you’ve sewn your rag quilt together, you’ll want to quilt it. For this, you’ll want to start by making three piles of squares. This is the foundation of the quilt. Once you have the foundation fabric and backing fabric, you can lay down the batting on top. Next, place the top fabric, right side facing up. Sew the top fabric over the batting.